How to create and format tables in PowerPoint using C#
Presenting data in paragraphs during a presentation is too complicated and can bore your audience. However, you can solve this simply by organizing the information in tables and displaying it in the most transparent way possible.
Table elements represent content in a rectangular grid, separating data into columns and rows. They are popular because they are easy to create and use visual resources to display data.
In this article, you will learn how to create tables in PowerPoint presentations, format them, and create table styles in your C# applications.
Using C# to create and format tables: How to install the GemBox.Presentation library
GemBox.Presentation is a .NET component that allows you to create and write PowerPoint files in a straightforward way.
You can easily install it by following these instructions:
Add the GemBox.Presentation package using the following command from the NuGet Package Manager Console:
Install-Package GemBox.PresentationAfter installing the GemBox.Presentation library, you must call the ComponentInfo.SetLicense method before using any other member of the library.
ComponentInfo.SetLicense("FREE-LIMITED-KEY");
In this tutorial, you will use "FREE-LIMITED-KEY" to work in the free mode. This mode allows using the library without purchasing a license, but with some limitations.
You can check this page for a complete step-by-step guide to installing and setting up GemBox.Presentation in other ways.
How to create a PowerPoint presentation in C#
If you are unfamiliar with creating a PPTX presentation using C#, you can start with this quick tutorial.
First, create a presentation using the PresentationDocument class.
var presentation = new PresentationDocument();Then add a slide, choosing the SlideLayoutType of your choice.
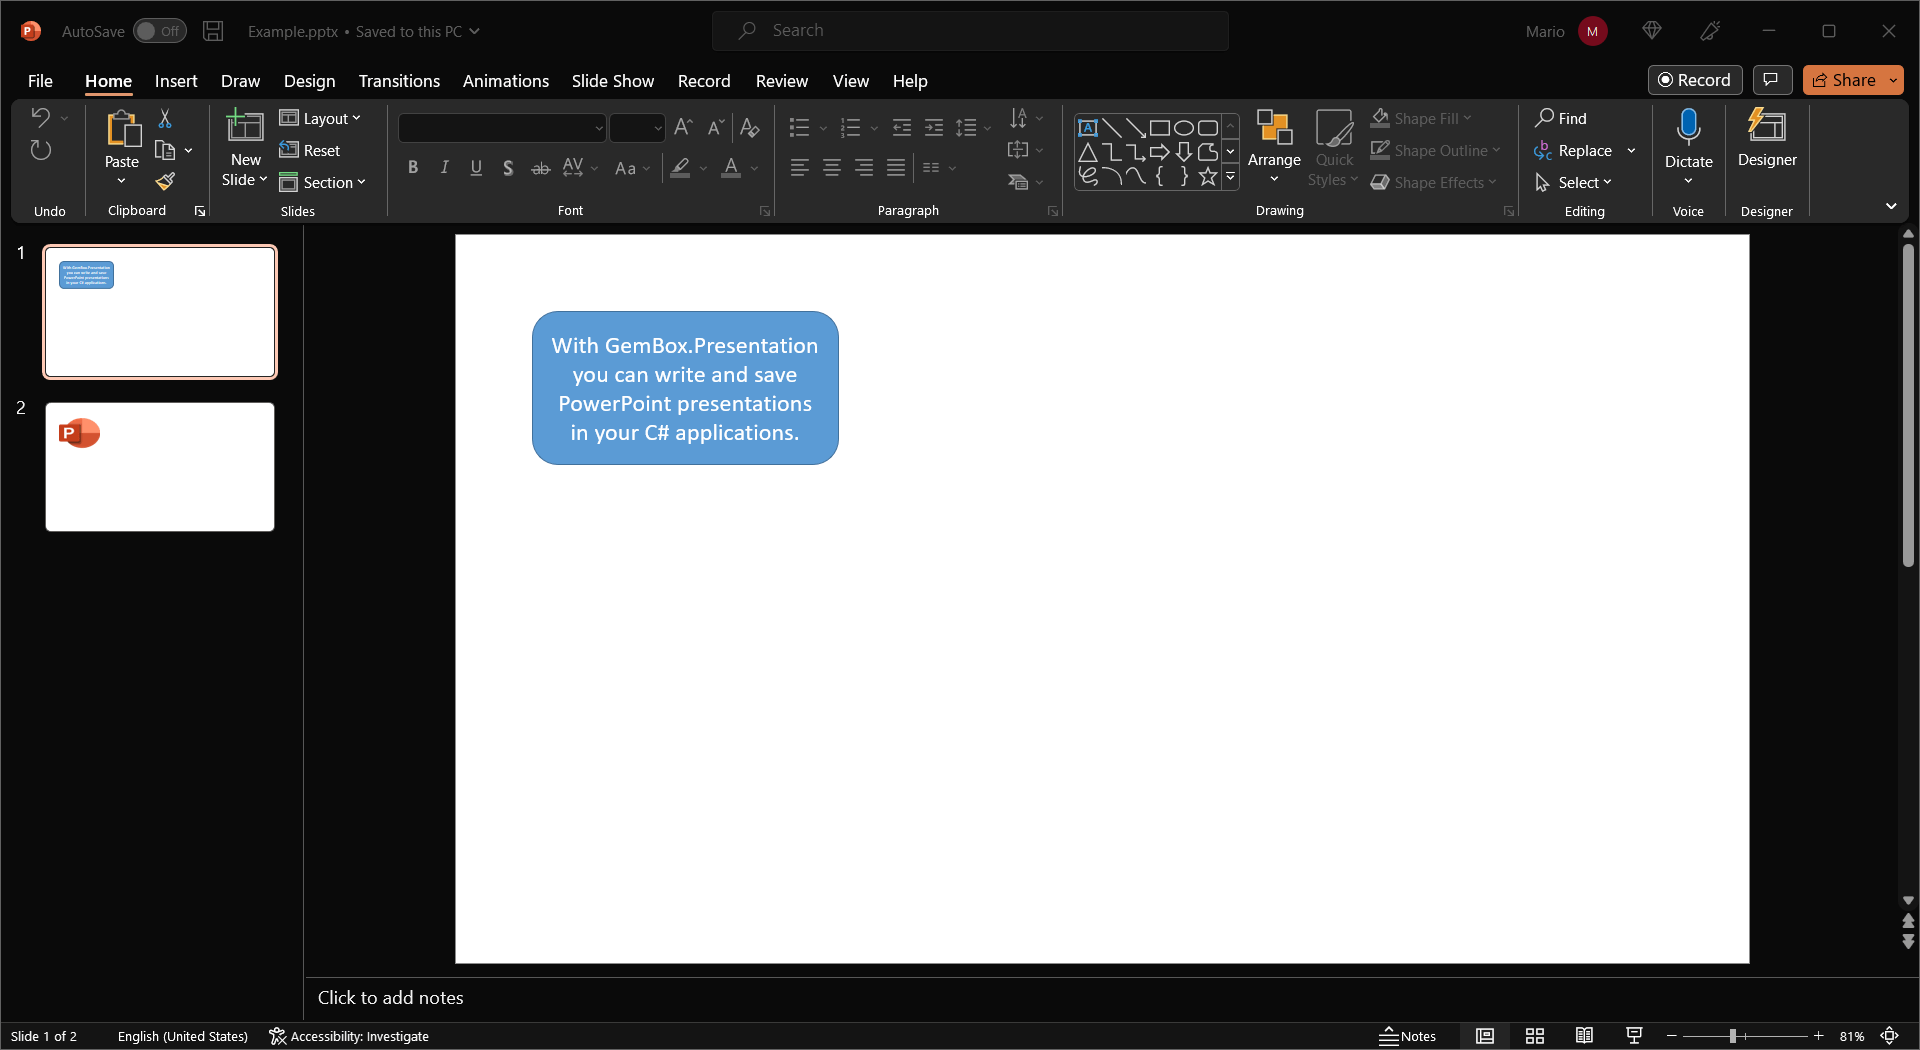
var slide = presentation.Slides.AddNew(SlideLayoutType.Custom);Add a rounded rectangle shape and fill it in with any text you want.
slide.Content.AddShape(ShapeGeometryType.RoundedRectangle, 2, 2, 8, 4, LengthUnit.Centimeter)
    .Text.AddParagraph().AddRun("With GemBox.Presentation you can write and save PowerPoint presentations in your C# applications.");
Add a second slide and insert an image from resource data. You can either change the picture path to the location of another picture on your computer or add a file named “picture1.png” to the solution, open the Properties window and set the “Copy to Output Directory” option to “Copy if newer”.
slide = presentation.Slides.AddNew(SlideLayoutType.Custom);
using (var stream = File.OpenRead("picture1.png"))
slide.Content.AddPicture(PictureContentType.Png, stream, 2, 2, 6, 5, LengthUnit.Centimeter);
Save the presentation as “.pptx”.
presentation.Save("Example.pptx");
After executing the code, you should have an output presentation that looks like the following screenshot:

How to create a simple table in a PowerPoint presentation
Creating a simple table in your presentation programmatically is easier than you may think.
Before following this tutorial, you should be aware that in the GemBox.Presentation API the table-related types are grouped in the GemBox.Presentation.Tables namespace.
Follow the next steps to create and fill in a simple table in your PPTX file with data:
Create a new presentation and the slide where you will place the table.
var presentation = new PresentationDocument();
var slide = presentation.Slides.AddNew(SlideLayoutType.Custom);
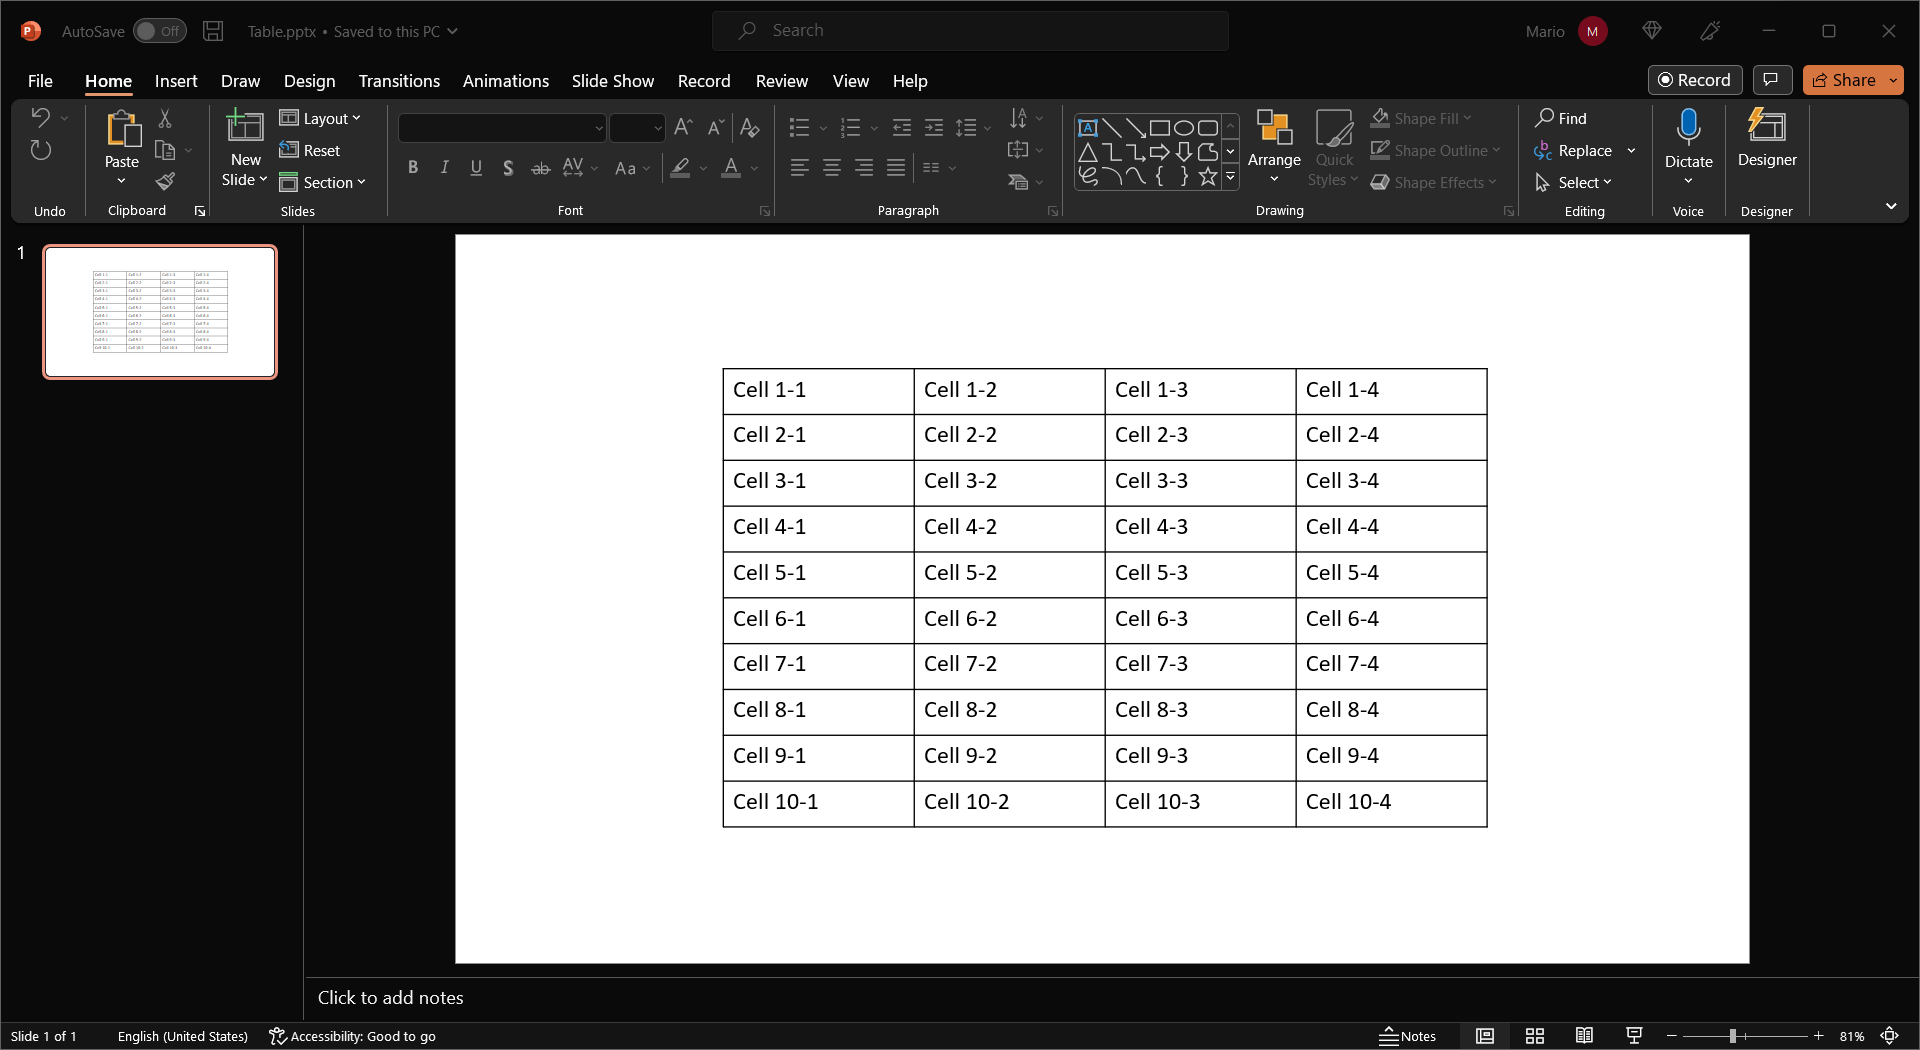
Next, create a new table. The size is adjusted to fit 4 columns and 10 rows.
var table = slide.Content.AddTable(7, 3.5, 20, 12, LengthUnit.Centimeter);Format the table with a no-style grid.
table.Format.Style = presentation.TableStyles.GetOrAdd( TableStyleName.NoStyleTableGrid);Create columns.
int columnCount = 4;
for (int i = 0; i < columnCount; i++)
table.Columns.AddNew(Length.From(5, LengthUnit.Centimeter));
Create rows with cells containing text.
int rowCount = 10;
for (int i = 0; i < rowCount; i++)
{
    var row = table.Rows.AddNew(Length.From(1.2, LengthUnit.Centimeter));
    for (int j = 0; j < columnCount; j++)
    {
        var cell = row.Cells.AddNew();
        cell.Text.AddParagraph().AddRun(string.Format(null, "Cell {0}-{1}", i + 1, j + 1));
    }
}
Save the presentation with the PresentationDocument.Save method.
presentation.Save("Table.pptx");
After executing the code, you should have an output presentation that looks like the following screenshot:

How to format a table in a presentation in C#
Apart from inserting new tables, you can also format existing ones whenever you need to display data in a more organized way.
This tutorial will show you how to format an existing table in a PowerPoint presentation:
Load the PPTX file.
var presentation = PresentationDocument.Load("Table.pptx");Get the table that needs formatting.
var table = presentation.Slides[0].Content.Drawings.OfType<GraphicFrame>().First(g => g.Table != null).Table;Format the table with a no-style grid and set a solid color to the table background. If you want to make it transparent, use the FillFormat.SetNone method.
table.Format.Style = presentation.TableStyles.GetOrAdd( TableStyleName.NoStyleTableGrid);
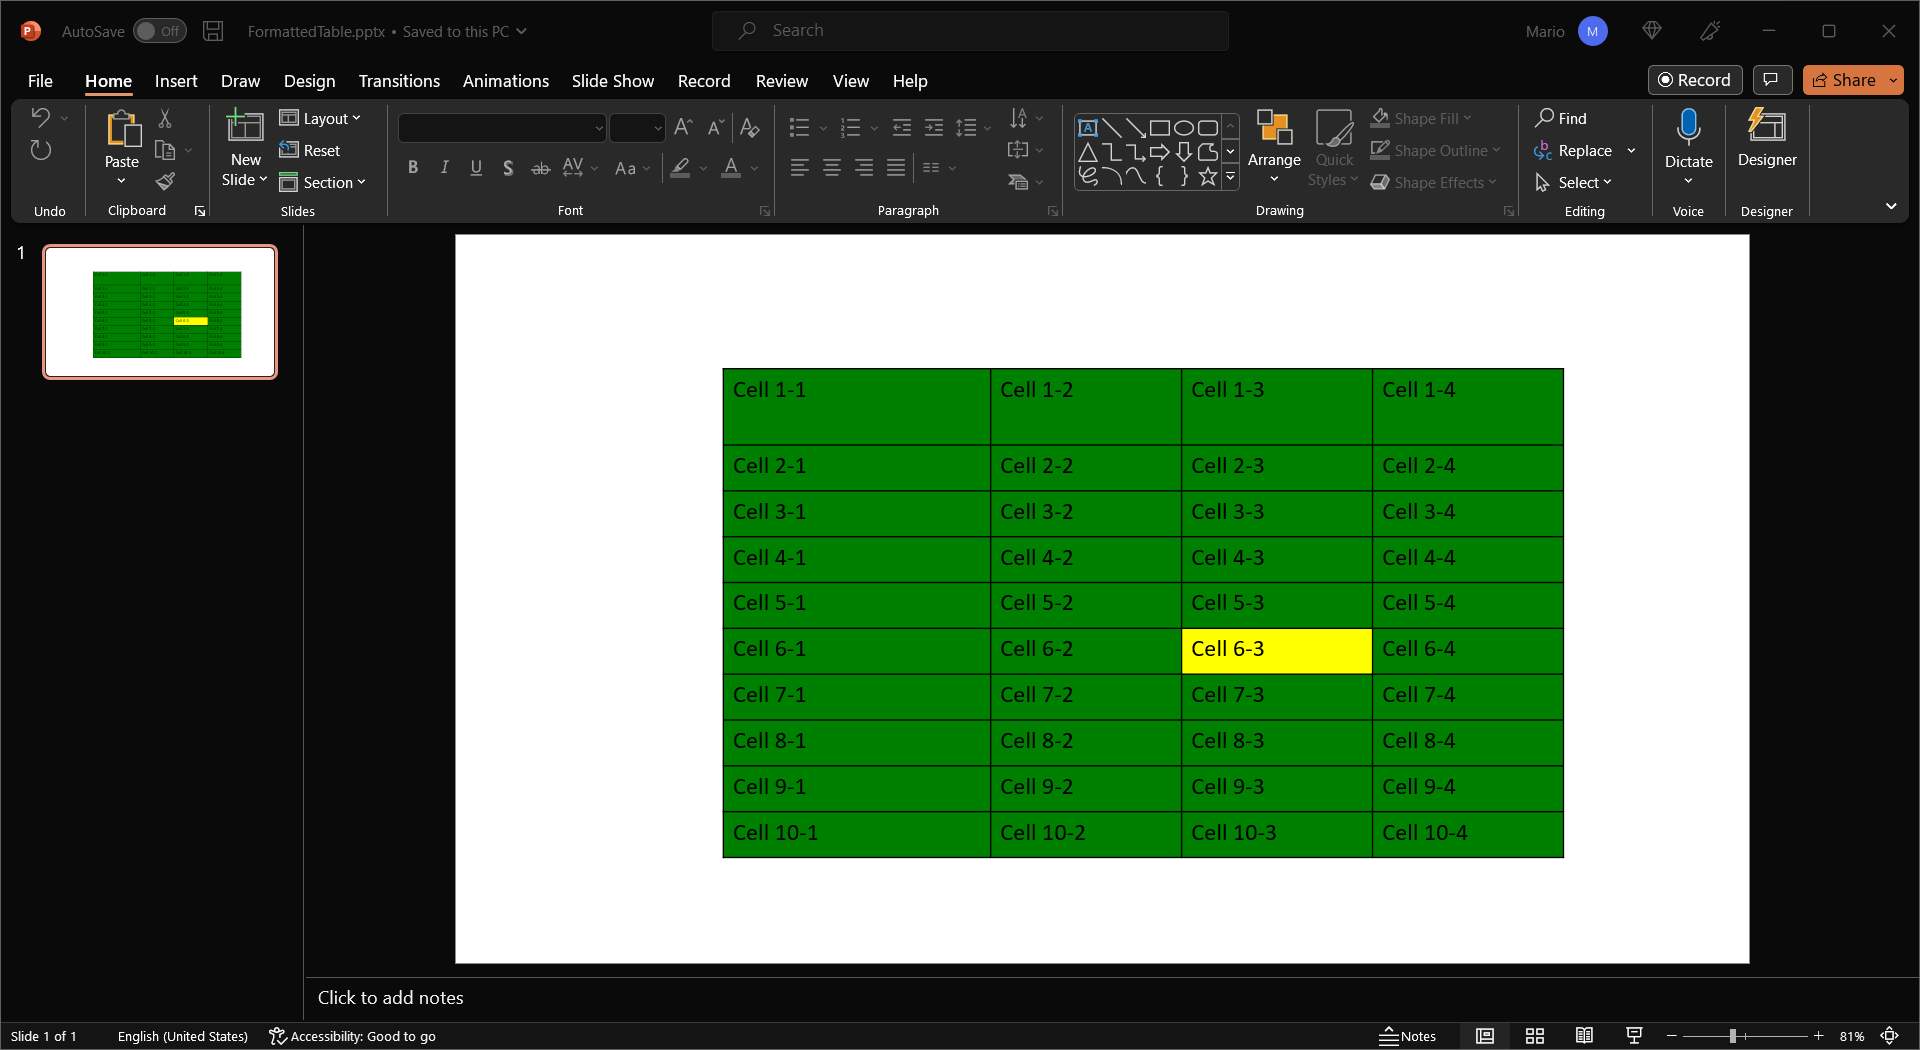
table.Format.Fill.SetSolid(Color.FromName(ColorName.Green));
You can resize a specific row or column of the table using the following code:
table.Columns[0].Width = Length.From(7, LengthUnit.Centimeter);
table.Rows[0].Height = Length.From(2, LengthUnit.Centimeter);
If you want to highlight a specific cell, containing the lowest value, for example, you can change just its cell color.
table.Rows[5].Cells[2].Format.Fill.SetSolid(Color.FromName(ColorName.Yellow));Finally, save your presentation with the new formatting to a PPTX file.
presentation.Save("FormattedTable.pptx");
The following image show how the table looks like after the formatting applied in the above code.

How to create table styles in a PPTX presentation
Instead of formatting your tables the same way and writing the same code over and over, you can simply create table styles, which you can later apply to tables you build in the future.
Follow the steps below to learn how to create table styles in your PowerPoint presentations.
Load a PowerPoint presentation and get the table.
var presentation = PresentationDocument.Load("Table.pptx");
var table = presentation.Slides[0].Content.Drawings.OfType<GraphicFrame>().First(g => g.Table != null).Table;
Create a new table style.
var myStyle = presentation.TableStyles.Create("My Table Style");You will first define the style for the whole table. To do that, you need to get the 'WholeTable" style part first.
var partStyle = myStyle[TablePartStyleType.WholeTable];Set the fill format.
partStyle.Fill.SetSolid(Color.FromName(ColorName.LightGray));Now set the "InsideHorizontal" border style for the whole table.
var border = partStyle.Borders[TableCellBorderType.InsideHorizontal];Set the border line format.
border.Fill.SetSolid(Color.FromName(ColorName.DarkGray));
border.Width = Length.From(1, LengthUnit.Point);
Next, get the "FirstRow" part style and set its fill to light blue.
partStyle = myStyle[TablePartStyleType.FirstRow];
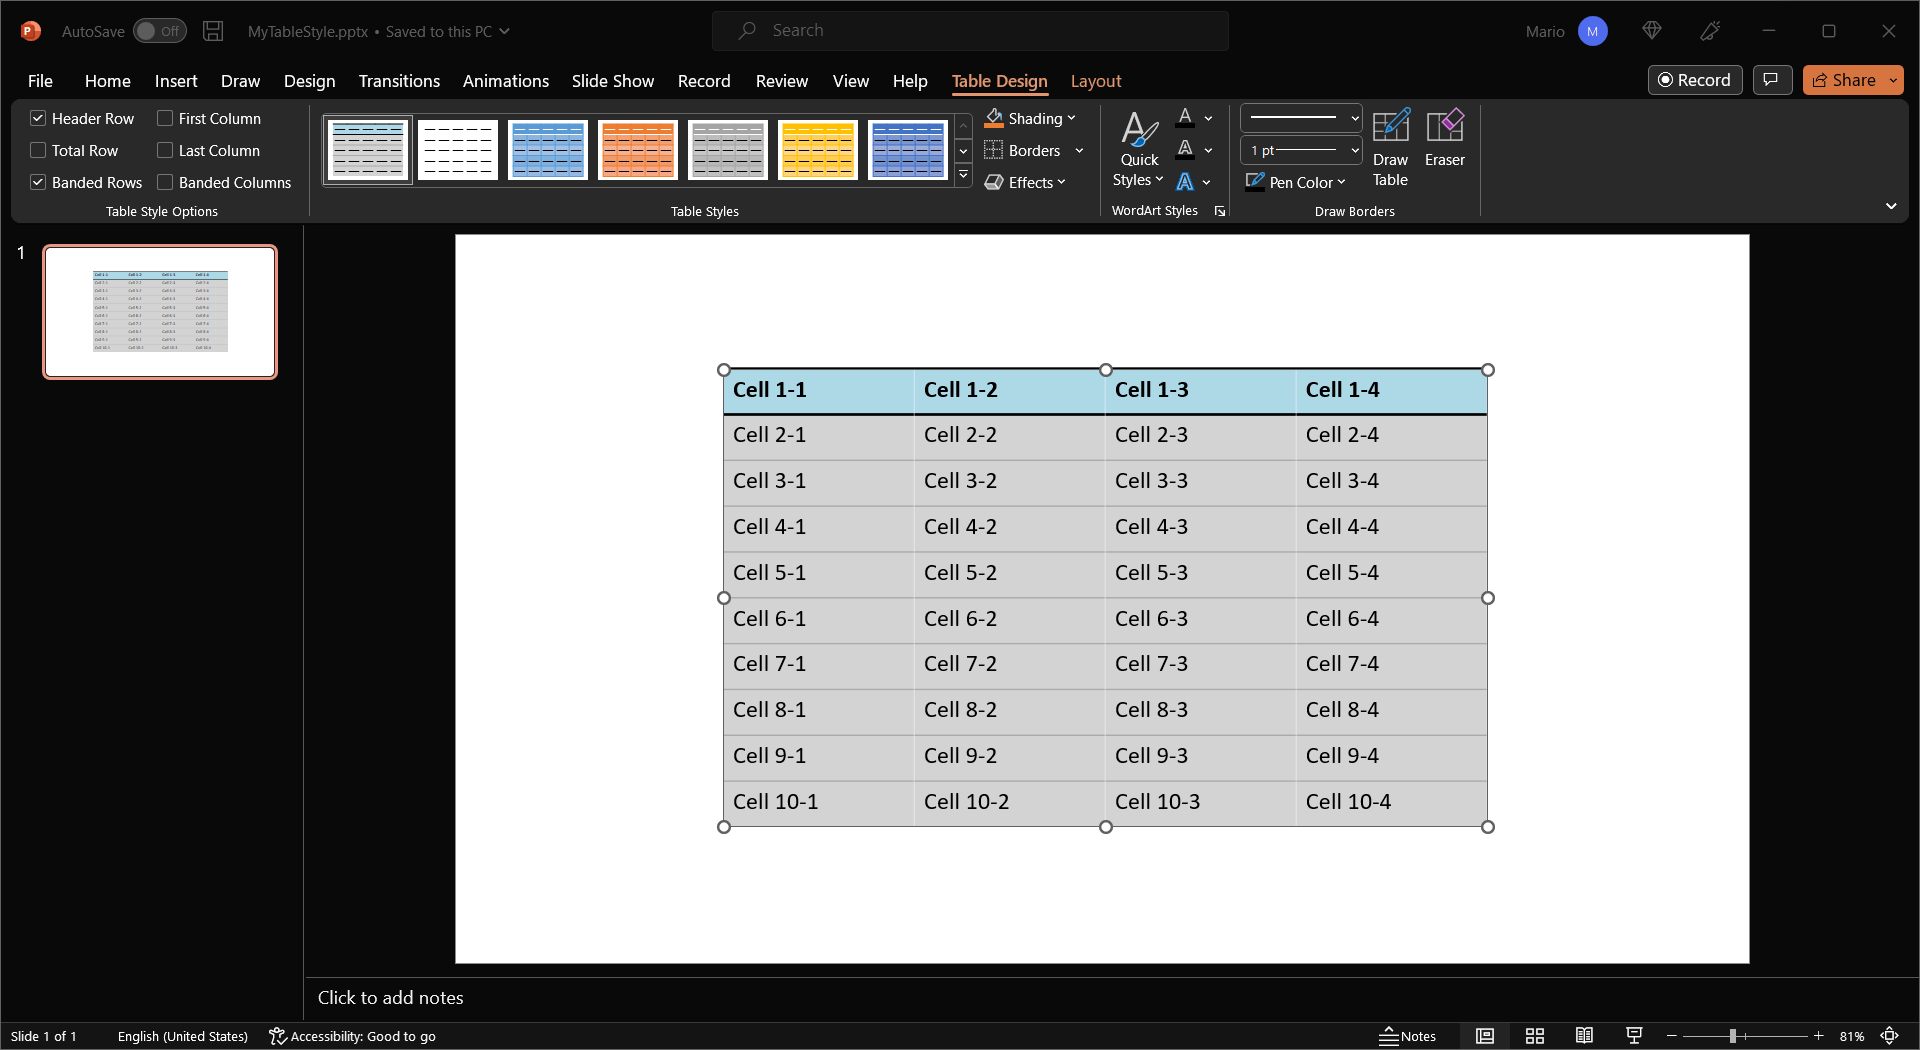
partStyle.Fill.SetSolid(Color.FromName(ColorName.LightBlue));
Make the first row borders thicker. Get the table border style.
border = partStyle.Borders[TableCellBorderType.Top];
border.Fill.SetSolid(Color.FromName(ColorName.Black));
border.Width = Length.From(2, LengthUnit.Point);

border = partStyle.Borders[TableCellBorderType.Bottom];
border.Fill.SetSolid(Color.FromName(ColorName.Black));
border.Width = Length.From(2, LengthUnit.Point);
You can also make the text in the first row bold.
partStyle.Text.Bold = true;
To apply the style you created you just need to follow the simple steps below:
Set the table style to a newly created style.
table.Format.Style = myStyle;Save the presentation.
presentation.Save("MyTableStyle.pptx");
After applying this table style, your new table should look like the following image.

Conclusion
This article showed you how to use GemBox.Presentation to create and format tables in PowerPoint slides programmatically in .NET.
For more information regarding the GemBox.Presentation library, check the documentation pages. We also recommend checking our GemBox.Presentation examples where you can learn how to use other features by running code.